
Using Dev Environments from GitHub Actions#
Introduction#
If you’ve encountered a GitHub Actions failure case and wish to debug it locally, this guide will help you set up an identical development environment to the one used.
Prerequisites#
You should have
condainstalled. Optionally, you can also installmambafor faster package installations.You should have Git and Bash installed.
Steps#
1. Download the environment YAML file#
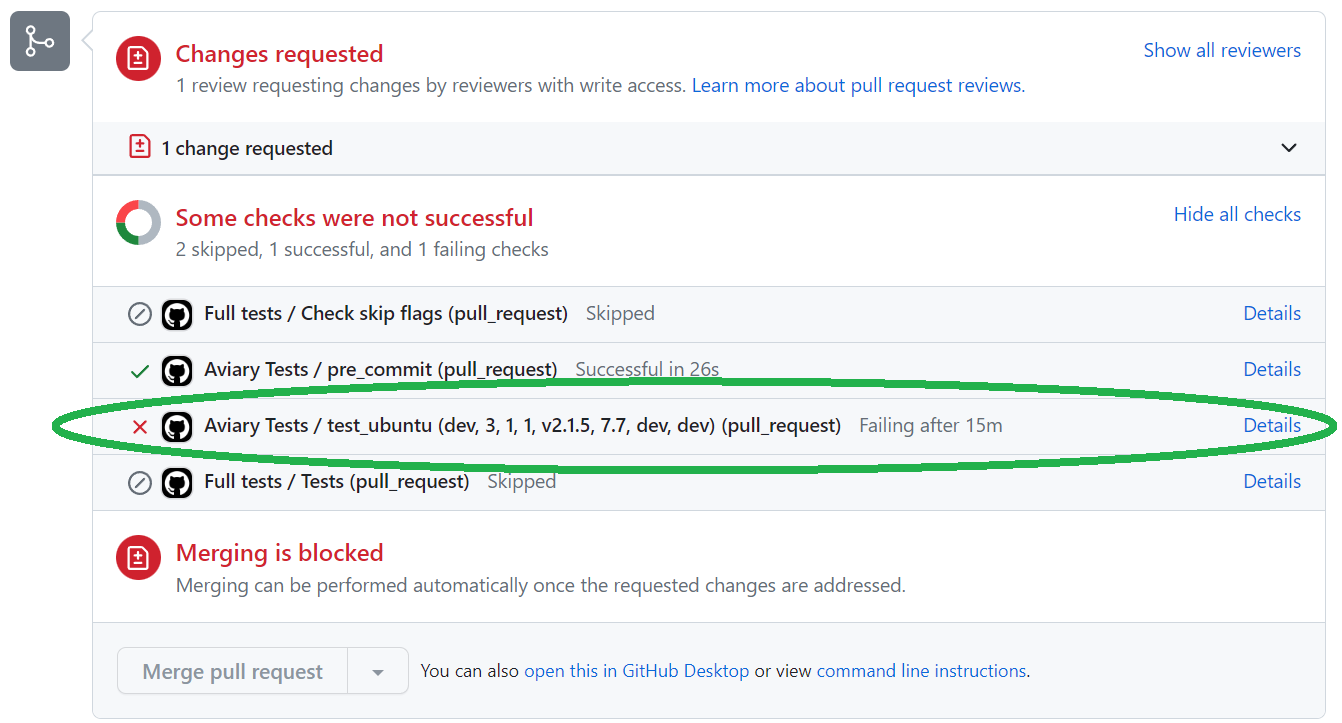
Navigate to the failing pull request (PR) in your repository. See the first screenshot below for what an example of a failing PR looks like.
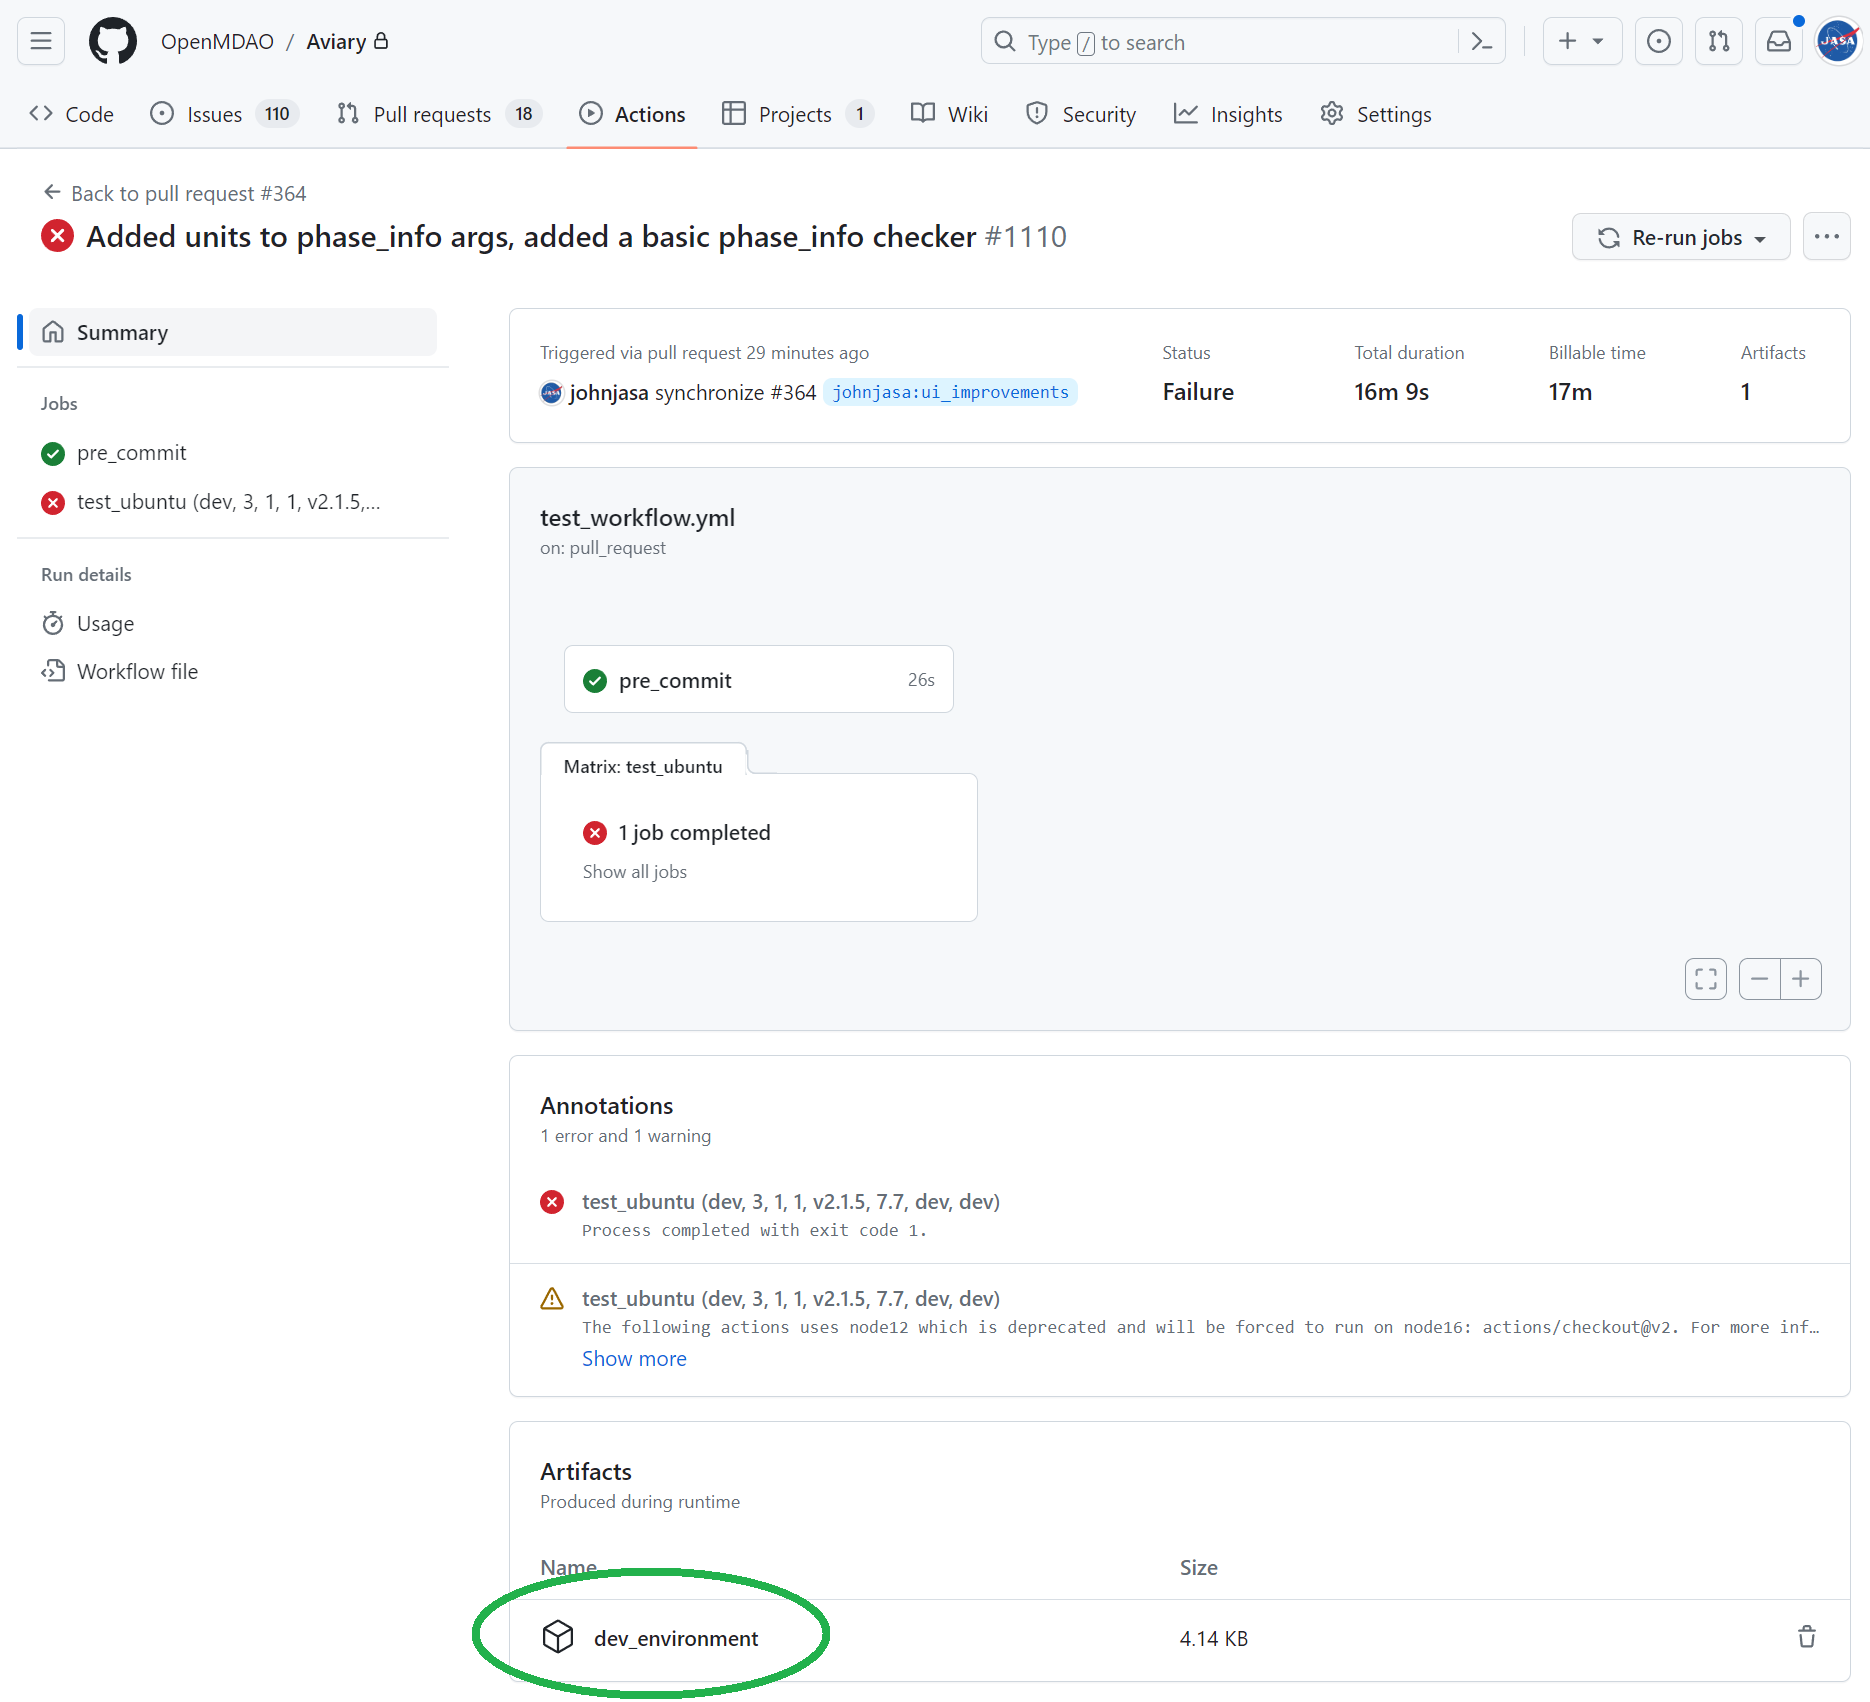
Locate the failed GitHub Actions workflow and go to the relevant “Artifacts” section to download the environment YAML file as shown in the screenshot.
The downloaded YAML file will be in a zipped format.
2. Unzip the YAML file#
Unzip the downloaded file to obtain the YAML file.
Place this YAML file in your local
Aviary/.githubfolder. The reason we recommend this location is that we have a helper script in this folder that you will use in the next steps.
3. Optional: install mamba#
While
condaworks well for package management, we recommend usingmambaas it is generally faster.You can read more about mamba in its user guide.
To install mamba, follow the installers on this link.
4. Run the helper script#
Open your terminal and navigate to the
Aviary/.githubfolder where you placed the YAML file and the script.Run the following command:
./install_env_from_github.sh <name_of_yml_file.yml> [optional env_name]
Note: The script may prompt you if an environment with the same name already exists. Type ‘y’ if you’re fine with overwriting that environment.
Note: You may need to add execute privileges to install_env_from_github.sh. This can be accomplished using:
chmod +x install_env_from_github.sh
What the script does#
The install_env_from_github.sh script does the following:
Checks for prerequisites and initiates package management via either
condaormamba.Reads the given YAML file and creates an intermediate version without specific packages like Aviary, pyOptSparse, and Simupy.
Checks if
openmdaoanddymosare set to development versions, and if so, prepares to install them from GitHub.Creates a new conda environment with the remaining packages.
Activates the new environment.
Installs development versions of
openmdaoanddymosfrom GitHub, if flagged.
Post-installation steps#
Once your new environment is set up, make sure to activate it if it is not already active from the helper script:
conda activate debug_env
After activation, run
testflo .inside the Aviary directory and you should see the same expected failures as GitHub Actions showed.testflo .Compare your local test results with the GitHub Actions results to identify discrepancies or issues.
Debug! Good luck and have fun.